Rigging the Shortbus Flasher

Rigging the Shortbus Flasher
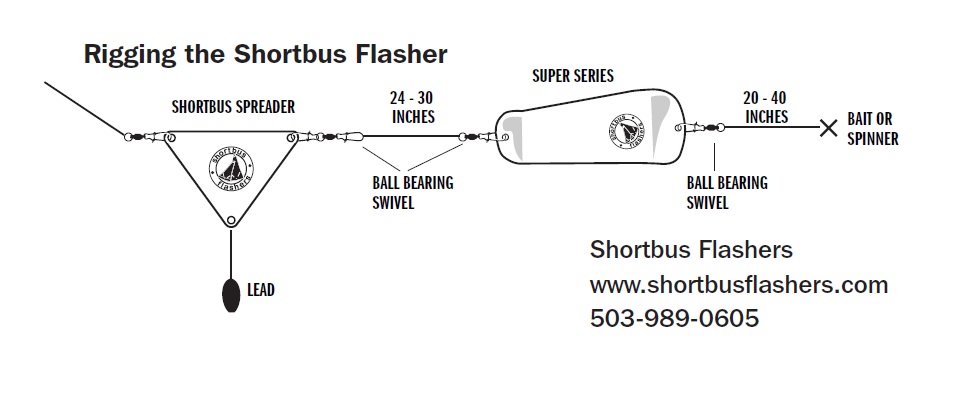
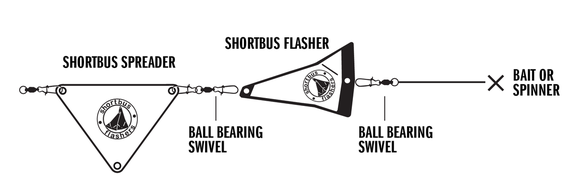
This is a “how to” rigging explanation of how to rig an inline fishing flasher from your rod to your bait with explanations on parts and steps – Order from rod to bait
- Start with sturdy rod with a soft enough tip to see the bite, but enough backbone to support the extra drag of the lead and flasher
- Slider to lead weight – allows the weight if caught in the net during fishing to not snag and break off the fish at the last second. While trolling, you will run a dropper length 12″-18″ long
- Swivel – puts a bumper between the slider and the flasher
- Note – you can substitute diver for lead dropper
- Swivel to flasher – use a piece of mono line at least as long as your dropper. What this will do is keep the weight from hitting the river bottom and swing up into the spinning flasher thus causing tangles
- Flasher – The most important part of the rigging, make sure you are using a “Shortbus Flasher”!!!
- Flasher to bait – normally 1′-6′ in length, depending on water clarity and action imparted on bait. Generally there is a 6 bead swivel placed half way between the bait and flasher. This gives the rotating bait a smoother roll and not have to work against the rotation of the flasher. If you are using a lure that does not spin or rotate, the swivel in the middle is not necessary to use
Remember!!
- Let the line out slow to keep the gear in line, to fast and you will tangle your gear.
- Don’t drag bottom – the weight kicking up into your flasher will inevitably get caught into your flasher or the flasher will drag again causing tangles
- Watch the total length of your bumper to bait. To long with a short fishing rod can make landing a fish “interesting” make sure you can control the fish to make the netters job easier
- Always have multiple Shortbus Flashers on board for your guests!
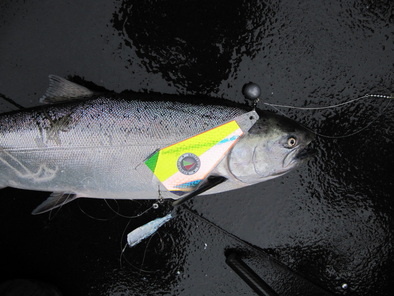
- Shortbus Flashers can be used for trolling salmon in freshwater or saltwater usage